best free website for a blog

Best Free Websites for Starting a Blog in 2023: Top Platforms for Beginners

Starting a blog is an excellent way to share your ideas, build an audience, and even earn money online. However, if you’re just starting out, you might not want to invest in a paid platform right away. Fortunately, there are several free websites that allow you to create and publish a blog without spending a dime. These platforms are perfect for beginners, offering user-friendly interfaces, free hosting, and basic features to help you get started.

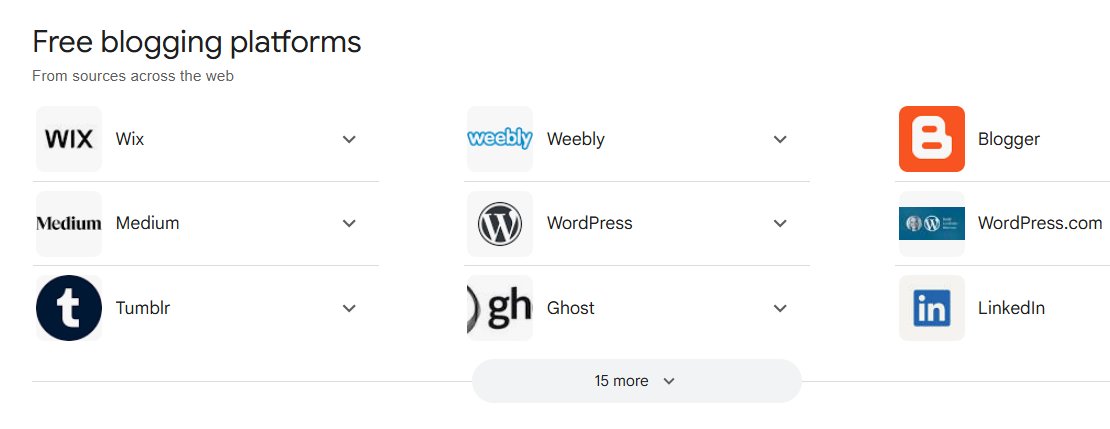
In this guide, we’ll explore the best free websites for starting a blog in 2023. Whether you’re a writer, photographer, or hobbyist, there’s a platform that’s perfect for your needs.


1. WordPress.com (Free Plan)

  • Why It’s Great:
    WordPress.com is one of the most popular blogging platforms in the world. Its free plan is perfect for beginners who want a balance of simplicity and flexibility.
  • Key Features:
    • Free hosting with a WordPress subdomain (e.g., yourblog.wordpress.com).
    • User-friendly drag-and-drop editor.
    • Hundreds of free themes and plugins.
    • Built-in SEO tools.
  • Limitations:
    • Free plan includes WordPress ads on your site.
    • Limited storage and customization options.
  • Best For: Beginners who want a powerful yet easy-to-use platform.

2. Blogger

  • Why It’s Great:
    Blogger, owned by Google, is a straightforward and reliable platform that’s perfect for casual bloggers. It’s simple to set up and requires no technical knowledge.
  • Key Features:
    • Free hosting with a Blogspot subdomain (e.g., yourblog.blogspot.com).
    • Easy-to-use interface with basic customization options.
    • Integration with Google services like AdSense and Analytics.
    • Free SSL for secure browsing.
  • Limitations:
    • Limited design and functionality compared to other platforms.
    • Outdated interface and fewer updates.
  • Best For: Casual bloggers who want a no-frills platform.

3. Wix (Free Plan)

  • Why It’s Great:
    Wix is known for its drag-and-drop website builder, making it one of the easiest platforms for beginners to create a visually appealing blog.
  • Key Features:
    • Free hosting with a Wix subdomain (e.g., yourblog.wixsite.com).
    • Drag-and-drop editor with stunning templates.
    • Mobile-friendly designs.
    • Free SSL and reliable hosting.
  • Limitations:
    • Free plan includes Wix ads on your site.
    • Limited storage and bandwidth.
  • Best For: Beginners who want a professional-looking blog without coding skills.

4. Medium

  • Why It’s Great:
    Medium is a minimalist platform that’s perfect for writers who want to focus solely on content. It has a built-in audience, making it easy to reach readers.
  • Key Features:
    • Free hosting with a Medium subdomain (e.g., medium.com/@yourblog).
    • Clean, distraction-free design.
    • Built-in audience and social features.
    • No need to worry about hosting, design, or maintenance.
  • Limitations:
    • Limited customization options.
    • You don’t own your content or domain.
  • Best For: Writers who want to focus on content and reach a built-in audience.

5. Weebly (Free Plan)

  • Why It’s Great:
    Weebly is another user-friendly platform that’s perfect for beginners. Its drag-and-drop editor makes it easy to create a blog quickly.
  • Key Features:
    • Free hosting with a Weebly subdomain (e.g., yourblog.weebly.com).
    • Drag-and-drop website builder.
    • Free SSL and reliable hosting.
    • Basic SEO tools.
  • Limitations:
    • Free plan includes Weebly ads.
    • Limited storage and design options.
  • Best For: Beginners who want a simple and intuitive platform.

6. Ghost (Free Tier)

  • Why It’s Great:
    Ghost is a modern platform that’s perfect for bloggers who want a clean, content-focused blog.
  • Key Features:
    • Free hosting with a Ghost subdomain (e.g., yourblog.ghost.io).
    • Clean, modern design focused on content.
    • Built-in SEO and analytics tools.
    • Markdown editor for easy formatting.
  • Limitations:
    • Free plan has limited features compared to paid plans.
    • Requires some technical knowledge for customization.
  • Best For: Bloggers who want a minimalist, professional-looking blog.

7. Tumblr

  • Why It’s Great:
    Tumblr is a unique platform that combines blogging with social networking. It’s perfect for creative individuals who want to share visual content.
  • Key Features:
    • Free hosting with a Tumblr subdomain (e.g., yourblog.tumblr.com).
    • Social media-like platform with a built-in community.
    • Easy to share multimedia content (images, GIFs, videos).
    • Customizable themes.
  • Limitations:
    • Limited SEO and monetization options.
    • Not ideal for long-form content.
  • Best For: Creative individuals who want to share visual content.

8. Substack

  • Why It’s Great:
    Substack is perfect for bloggers who want to build an email list and monetize their content through subscriptions.
  • Key Features:
    • Free hosting with a Substack subdomain (e.g., yourblog.substack.com).
    • Focus on email newsletters and subscriptions.
    • Built-in monetization options (paid subscriptions).
    • Simple and easy to use.
  • Limitations:
    • Limited design and customization options.
    • Best suited for text-based content.
  • Best For: Bloggers who want to monetize through newsletters.

9. LinkedIn Articles

  • Why It’s Great:
    LinkedIn Articles is ideal for professionals who want to share industry insights, career advice, or business-related content.
  • Key Features:
    • Free publishing platform integrated with LinkedIn.
    • Reach a professional audience.
    • No need to set up a separate blog.
  • Limitations:
    • Limited customization and ownership.
    • Content is tied to your LinkedIn profile.
  • Best For: Professionals who want to build their personal brand.

10. Joomla (Free and Open Source)

  • Why It’s Great:
    Joomla is a powerful platform for users who want full control over their blog’s design and functionality.
  • Key Features:
    • Free and open-source platform.
    • Highly customizable with thousands of extensions.
    • Suitable for complex websites and blogs.
  • Limitations:
    • Requires technical knowledge to set up and manage.
    • Not as beginner-friendly as other platforms.
  • Best For: Advanced users and developers.

How to Choose the Best Free Website for Your Blog

When selecting a free website for your blog, consider the following factors:

  1. Ease of Use: Choose a platform with a simple interface and drag-and-drop functionality.
  2. Customization: Look for platforms with customizable themes and templates.
  3. Purpose: Consider what type of content you want to create (e.g., text, images, videos).
  4. Audience: Think about where your target audience is most active.
  5. Scalability: Choose a platform that allows you to upgrade to a paid plan as your blog grows.

Final Thoughts

Starting a blog doesn’t have to be expensive or complicated. With the free websites listed above, you can create and publish content easily, even if you have no technical skills. Whether you’re a writer, photographer, or hobbyist, there’s a platform that’s perfect for your needs.

Remember, while free platforms are great for getting started, upgrading to a paid plan or self-hosted solution (like WordPress.org) can provide more flexibility and control as your blog grows. Happy blogging!

completely free blogging sites

Completely Free Blogging Sites in 2023: Start Your Blog Without Spending a Dime

If you’re looking to start a blog without spending any money, there are several completely free blogging sites available that allow you to create and publish content at no cost. These platforms are perfect for beginners, hobbyists, or anyone who wants to test the waters of blogging before committing to a paid solution.

In this guide, we’ll explore the best completely free blogging sites in 2023. These platforms offer free hosting, subdomains, and basic features to help you get started quickly and easily.


1. WordPress.com (Free Plan)

  • Features:
    • Free hosting with a WordPress subdomain (e.g., yourblog.wordpress.com).
    • User-friendly interface with drag-and-drop functionality.
    • Hundreds of free themes and plugins.
    • Built-in SEO tools.
  • Limitations:
    • Free plan includes WordPress ads on your site.
    • Limited storage and customization options.
  • Why Choose WordPress.com?
    WordPress.com is one of the most popular blogging platforms, offering a balance of simplicity and flexibility. It’s perfect for beginners who want to start blogging quickly.

2. Blogger

  • Features:
    • Free hosting with a Blogspot subdomain (e.g., yourblog.blogspot.com).
    • Simple and intuitive interface.
    • Integration with Google services like AdSense and Analytics.
    • Free SSL for secure browsing.
  • Limitations:
    • Limited design and functionality compared to other platforms.
    • Outdated interface and fewer updates.
  • Why Choose Blogger?
    Blogger is a no-frills platform that’s perfect for casual bloggers. It’s easy to set up and requires no technical knowledge.

3. Medium

  • Features:
    • Free hosting with a Medium subdomain (e.g., medium.com/@yourblog).
    • Clean, minimalist design focused on content.
    • Built-in audience and social features.
    • No need to worry about hosting, design, or maintenance.
  • Limitations:
    • Limited customization options.
    • You don’t own your content or domain.
  • Why Choose Medium?
    Medium is ideal for writers who want to focus solely on content and reach a built-in audience. It’s great for sharing stories, opinions, and expertise.

4. Wix (Free Plan)

  • Features:
    • Free hosting with a Wix subdomain (e.g., yourblog.wixsite.com).
    • Drag-and-drop editor with stunning templates.
    • Mobile-friendly designs.
    • Free SSL and reliable hosting.
  • Limitations:
    • Free plan includes Wix ads on your site.
    • Limited storage and bandwidth.
  • Why Choose Wix?
    Wix is perfect for beginners who want a professional-looking blog without needing any coding skills. Its drag-and-drop editor makes it easy to design your blog.

5. Weebly (Free Plan)

  • Features:
    • Free hosting with a Weebly subdomain (e.g., yourblog.weebly.com).
    • Drag-and-drop website builder.
    • Free SSL and reliable hosting.
    • Basic SEO tools.
  • Limitations:
    • Free plan includes Weebly ads.
    • Limited storage and design options.
  • Why Choose Weebly?
    Weebly is a great choice for beginners who want a simple and intuitive platform to start their blogging journey.

6. Ghost (Free Tier)

  • Features:
    • Free hosting with a Ghost subdomain (e.g., yourblog.ghost.io).
    • Clean, modern design focused on content.
    • Built-in SEO and analytics tools.
    • Markdown editor for easy formatting.
  • Limitations:
    • Free plan has limited features compared to paid plans.
    • Requires some technical knowledge for customization.
  • Why Choose Ghost?
    Ghost is ideal for bloggers who want a minimalist, professional-looking blog without distractions.

7. Tumblr

  • Features:
    • Free hosting with a Tumblr subdomain (e.g., yourblog.tumblr.com).
    • Social media-like platform with a built-in community.
    • Easy to share multimedia content (images, GIFs, videos).
    • Customizable themes.
  • Limitations:
    • Limited SEO and monetization options.
    • Not ideal for long-form content.
  • Why Choose Tumblr?
    Tumblr is great for creative individuals who want to share visual content and connect with like-minded users.

8. Substack

  • Features:
    • Free hosting with a Substack subdomain (e.g., yourblog.substack.com).
    • Focus on email newsletters and subscriptions.
    • Built-in monetization options (paid subscriptions).
    • Simple and easy to use.
  • Limitations:
    • Limited design and customization options.
    • Best suited for text-based content.
  • Why Choose Substack?
    Substack is perfect for bloggers who want to build an email list and monetize their content through subscriptions.

9. LinkedIn Articles

  • Features:
    • Free publishing platform integrated with LinkedIn.
    • Reach a professional audience.
    • No need to set up a separate blog.
  • Limitations:
    • Limited customization and ownership.
    • Content is tied to your LinkedIn profile.
  • Why Choose LinkedIn Articles?
    LinkedIn Articles is ideal for professionals who want to share industry insights, career advice, or business-related content.

10. Joomla (Free and Open Source)

  • Features:
    • Free and open-source platform.
    • Highly customizable with thousands of extensions.
    • Suitable for complex websites and blogs.
  • Limitations:
    • Requires technical knowledge to set up and manage.
    • Not as beginner-friendly as other platforms.
  • Why Choose Joomla?
    Joomla is a powerful platform for users who want full control over their blog’s design and functionality.

How to Choose the Best Completely Free Blogging Site

When selecting a free blogging site, consider the following factors:

  1. Ease of Use: Choose a platform with a simple interface and drag-and-drop functionality.
  2. Customization: Look for platforms with customizable themes and templates.
  3. Purpose: Consider what type of content you want to create (e.g., text, images, videos).
  4. Audience: Think about where your target audience is most active.
  5. Scalability: Choose a platform that allows you to upgrade to a paid plan as your blog grows.

Final Thoughts

Starting a blog doesn’t have to be expensive or complicated. With the completely free blogging sites listed above, you can create and publish content easily, even if you have no technical skills. Whether you’re a writer, photographer, or hobbyist, there’s a platform that’s perfect for your needs.

Remember, while free platforms are great for getting started, upgrading to a paid plan or self-hosted solution (like WordPress.org) can provide more flexibility and control as your blog grows. Happy blogging!

best free blogging platform for beginners

Best Free Blogging Platforms for Beginners in 2023: Start Your Blogging Journey Easily

Starting a blog can be an exciting and rewarding experience, but for beginners, the process can feel overwhelming. Choosing the right platform is crucial, especially if you’re just starting out and don’t want to invest money upfront. Fortunately, there are several free blogging platforms that are beginner-friendly, easy to use, and perfect for launching your first blog.

In this guide, we’ll explore the best free blogging platforms for beginners in 2023. These platforms are designed to help you get started quickly, even if you have no technical skills or prior experience.


1. WordPress.com

  • Why It’s Great for Beginners:
    WordPress.com is one of the most popular blogging platforms in the world, and for good reason. It’s user-friendly, highly customizable, and offers a free plan that’s perfect for beginners.
  • Key Features:
    • Free hosting with a WordPress subdomain (e.g., yourblog.wordpress.com).
    • Intuitive drag-and-drop editor.
    • Hundreds of free themes to customize your blog’s design.
    • Built-in SEO tools to help your blog rank on search engines.
    • Option to upgrade to a paid plan for more features (e.g., custom domain, advanced analytics).
  • Limitations:
    • Free plan includes WordPress ads on your site.
    • Limited storage and customization options.
  • Why Choose WordPress.com?
    WordPress.com is ideal for beginners who want a balance of simplicity and flexibility. It’s easy to use, yet powerful enough to grow with you as your blog expands.

2. Blogger

  • Why It’s Great for Beginners:
    Blogger, owned by Google, is a straightforward and reliable platform that’s perfect for casual bloggers. It’s simple to set up and requires no technical knowledge.
  • Key Features:
    • Free hosting with a Blogspot subdomain (e.g., yourblog.blogspot.com).
    • Easy-to-use interface with basic customization options.
    • Integration with Google services like AdSense and Analytics.
    • Free SSL for secure browsing.
  • Limitations:
    • Limited design and functionality compared to other platforms.
    • Outdated interface and fewer updates.
  • Why Choose Blogger?
    Blogger is a no-frills platform that’s perfect for beginners who want to start blogging quickly without worrying about complex features.

3. Wix

  • Why It’s Great for Beginners:
    Wix is known for its drag-and-drop website builder, making it one of the easiest platforms for beginners to create a visually appealing blog.
  • Key Features:
    • Free hosting with a Wix subdomain (e.g., yourblog.wixsite.com).
    • Drag-and-drop editor with stunning templates.
    • Mobile-friendly designs.
    • Free SSL and reliable hosting.
    • App market for additional features.
  • Limitations:
    • Free plan includes Wix ads on your site.
    • Limited storage and bandwidth.
  • Why Choose Wix?
    Wix is perfect for beginners who want a professional-looking blog without needing any coding skills. Its drag-and-drop editor makes it easy to design your blog exactly how you want it.

4. Medium

  • Why It’s Great for Beginners:
    Medium is a minimalist platform that’s perfect for writers who want to focus solely on content. It’s easy to use and has a built-in audience.
  • Key Features:
    • Free hosting with a Medium subdomain (e.g., medium.com/@yourblog).
    • Clean, distraction-free design.
    • Built-in audience and social features.
    • No need to worry about hosting, design, or maintenance.
  • Limitations:
    • Limited customization options.
    • You don’t own your content or domain.
  • Why Choose Medium?
    Medium is ideal for beginners who want to start blogging without the hassle of managing a website. It’s great for sharing stories, opinions, and expertise.

5. Weebly

  • Why It’s Great for Beginners:
    Weebly is another user-friendly platform that’s perfect for beginners. Its drag-and-drop editor makes it easy to create a blog quickly.
  • Key Features:
    • Free hosting with a Weebly subdomain (e.g., yourblog.weebly.com).
    • Drag-and-drop website builder.
    • Free SSL and reliable hosting.
    • Basic SEO tools.
    • Option to upgrade for more features.
  • Limitations:
    • Free plan includes Weebly ads.
    • Limited storage and design options.
  • Why Choose Weebly?
    Weebly is a great choice for beginners who want a simple and intuitive platform to start their blogging journey.

6. Ghost (Free Tier)

  • Why It’s Great for Beginners:
    Ghost is a modern platform that’s perfect for beginners who want a clean, content-focused blog.
  • Key Features:
    • Free hosting with a Ghost subdomain (e.g., yourblog.ghost.io).
    • Clean, modern design focused on content.
    • Built-in SEO and analytics tools.
    • Markdown editor for easy formatting.
  • Limitations:
    • Free plan has limited features compared to paid plans.
    • Requires some technical knowledge for customization.
  • Why Choose Ghost?
    Ghost is ideal for beginners who want a minimalist, professional-looking blog without distractions.

7. Tumblr

  • Why It’s Great for Beginners:
    Tumblr is a unique platform that combines blogging with social networking. It’s perfect for creative individuals who want to share visual content.
  • Key Features:
    • Free hosting with a Tumblr subdomain (e.g., yourblog.tumblr.com).
    • Social media-like platform with a built-in community.
    • Easy to share multimedia content (images, GIFs, videos).
    • Customizable themes.
  • Limitations:
    • Limited SEO and monetization options.
    • Not ideal for long-form content.
  • Why Choose Tumblr?
    Tumblr is great for beginners who want to share creative content and connect with like-minded users.

How to Choose the Best Free Blogging Platform for You

When selecting a free blogging platform, consider the following factors:

  1. Ease of Use: Choose a platform with a simple interface and drag-and-drop functionality.
  2. Customization: Look for platforms with customizable themes and templates.
  3. Purpose: Consider what type of content you want to create (e.g., text, images, videos).
  4. Audience: Think about where your target audience is most active.
  5. Scalability: Choose a platform that allows you to upgrade to a paid plan as your blog grows.

Final Thoughts

Starting a blog as a beginner doesn’t have to be complicated or expensive. With the free blogging platforms listed above, you can create and publish content easily, even if you have no technical skills. Whether you’re a writer, photographer, or hobbyist, there’s a platform that’s perfect for your needs.

Remember, while free platforms are great for getting started, upgrading to a paid plan or self-hosted solution (like WordPress.org) can provide more flexibility and control as your blog grows. Happy blogging!

best free websites for blogging

Best Free Websites for Blogging in 2023: Start Your Blog Without Spending a Dime

Blogging has become one of the most popular ways to share ideas, build an audience, and even earn money online. Whether you’re a hobbyist, a professional, or an entrepreneur, starting a blog is easier than ever thanks to free blogging platforms. These platforms allow you to create and publish content without any upfront costs, making them ideal for beginners or those on a tight budget.

In this article, we’ll explore the best free websites for blogging in 2023. Each platform has its own strengths and weaknesses, so you can choose the one that best suits your needs.


1. WordPress.com

  • Best For: Beginners and professional bloggers.
  • Features:
    • Free hosting with a WordPress subdomain (e.g., yourblog.wordpress.com).
    • User-friendly interface with drag-and-drop functionality.
    • Hundreds of free themes and plugins.
    • Built-in SEO tools.
    • Option to upgrade to a paid plan for more features (e.g., custom domain, advanced analytics).
  • Limitations:
    • Free plan includes WordPress ads on your site.
    • Limited storage and customization options.
  • Why Choose WordPress.com?
    WordPress.com is one of the most popular blogging platforms in the world, offering a balance of simplicity and flexibility. It’s perfect for beginners who want to start blogging quickly while having the option to scale up later.

2. Blogger

  • Best For: Casual bloggers and Google enthusiasts.
  • Features:
    • Free hosting with a Blogspot subdomain (e.g., yourblog.blogspot.com).
    • Simple and intuitive interface.
    • Integration with Google services like AdSense and Analytics.
    • Customizable templates.
    • Free SSL for secure browsing.
  • Limitations:
    • Limited design and functionality compared to other platforms.
    • Outdated interface and fewer updates.
  • Why Choose Blogger?
    Blogger is a great choice for those who want a straightforward, no-frills blogging experience. It’s owned by Google, so it integrates seamlessly with other Google tools.

3. Wix

  • Best For: Visually-oriented bloggers and small businesses.
  • Features:
    • Free hosting with a Wix subdomain (e.g., yourblog.wixsite.com).
    • Drag-and-drop website builder with stunning templates.
    • Mobile-friendly designs.
    • Free SSL and reliable hosting.
    • App market for additional features.
  • Limitations:
    • Free plan includes Wix ads on your site.
    • Limited storage and bandwidth.
  • Why Choose Wix?
    Wix is perfect for bloggers who want a visually appealing blog without needing coding skills. Its drag-and-drop editor makes it easy to create a professional-looking site.

4. Medium

  • Best For: Writers and thought leaders.
  • Features:
    • Free hosting with a Medium subdomain (e.g., medium.com/@yourblog).
    • Clean, minimalist design focused on content.
    • Built-in audience and social features.
    • No need to worry about hosting, design, or maintenance.
  • Limitations:
    • Limited customization options.
    • You don’t own your content or domain.
  • Why Choose Medium?
    Medium is ideal for writers who want to focus solely on content and reach a built-in audience. It’s a great platform for sharing stories, opinions, and expertise.

5. Weebly

  • Best For: Beginners and small businesses.
  • Features:
    • Free hosting with a Weebly subdomain (e.g., yourblog.weebly.com).
    • Drag-and-drop website builder.
    • Free SSL and reliable hosting.
    • Basic SEO tools.
    • Option to upgrade for more features.
  • Limitations:
    • Free plan includes Weebly ads.
    • Limited storage and design options.
  • Why Choose Weebly?
    Weebly is another user-friendly platform that’s perfect for beginners. Its drag-and-drop editor and simple interface make it easy to create a blog quickly.

6. Ghost (Free Tier)

  • Best For: Professional bloggers and content creators.
  • Features:
    • Free hosting with a Ghost subdomain (e.g., yourblog.ghost.io).
    • Clean, modern design focused on content.
    • Built-in SEO and analytics tools.
    • Markdown editor for easy formatting.
  • Limitations:
    • Free plan has limited features compared to paid plans.
    • Requires some technical knowledge for customization.
  • Why Choose Ghost?
    Ghost is a powerful platform for bloggers who want a minimalist, content-focused experience. It’s particularly popular among professional writers and publishers.

7. Substack

  • Best For: Newsletter-style blogs and writers.
  • Features:
    • Free hosting with a Substack subdomain (e.g., yourblog.substack.com).
    • Focus on email newsletters and subscriptions.
    • Built-in monetization options (paid subscriptions).
    • Simple and easy to use.
  • Limitations:
    • Limited design and customization options.
    • Best suited for text-based content.
  • Why Choose Substack?
    Substack is perfect for bloggers who want to build an email list and monetize their content through subscriptions. It’s ideal for writers, journalists, and niche experts.

8. Tumblr

  • Best For: Creative and visual bloggers.
  • Features:
    • Free hosting with a Tumblr subdomain (e.g., yourblog.tumblr.com).
    • Social media-like platform with a built-in community.
    • Easy to share multimedia content (images, GIFs, videos).
    • Customizable themes.
  • Limitations:
    • Limited SEO and monetization options.
    • Not ideal for long-form content.
  • Why Choose Tumblr?
    Tumblr is a unique platform that combines blogging with social networking. It’s perfect for creative individuals who want to share visual content and connect with like-minded users.

9. Joomla

  • Best For: Advanced users and developers.
  • Features:
    • Free and open-source platform.
    • Highly customizable with thousands of extensions.
    • Suitable for complex websites and blogs.
  • Limitations:
    • Requires technical knowledge to set up and manage.
    • Not as beginner-friendly as other platforms.
  • Why Choose Joomla?
    Joomla is a powerful platform for users who want full control over their blog’s design and functionality. It’s best suited for those with coding experience or a willingness to learn.

10. LinkedIn Articles

  • Best For: Professionals and business bloggers.
  • Features:
    • Free publishing platform integrated with LinkedIn.
    • Reach a professional audience.
    • No need to set up a separate blog.
  • Limitations:
    • Limited customization and ownership.
    • Content is tied to your LinkedIn profile.
  • Why Choose LinkedIn Articles?
    LinkedIn Articles is ideal for professionals who want to share industry insights, career advice, or business-related content. It’s a great way to build your personal brand.

How to Choose the Best Free Blogging Platform

When selecting a free blogging platform, consider the following factors:

  1. Ease of Use: If you’re a beginner, choose a platform with a simple interface and drag-and-drop functionality.
  2. Customization: If you want more control over your blog’s design, opt for a platform with customizable themes and templates.
  3. Monetization: If you plan to earn money from your blog, ensure the platform supports ads, affiliate links, or other monetization methods.
  4. Audience: Consider where your target audience is most active. For example, Medium is great for reaching readers, while Tumblr is ideal for visual content.
  5. Scalability: If you plan to grow your blog, choose a platform that allows you to upgrade to a paid plan with more features.

Final Thoughts

Starting a blog doesn’t have to be expensive or complicated. With the free blogging platforms listed above, you can create and publish content without spending a dime. Whether you’re a writer, photographer, entrepreneur, or hobbyist, there’s a platform that’s perfect for your needs.

Remember, while free platforms are great for getting started, upgrading to a paid plan or self-hosted solution (like WordPress.org) can provide more flexibility and control as your blog grows. Happy blogging!

A Comprehensive Guide to Getting Approved for AdMob and AdSense: Tips, Strategies, and Best Practices

In the world of online monetization, Google AdMob and AdSense are two of the most popular platforms for publishers and app developers to generate revenue. AdMob is specifically designed for mobile apps, while AdSense is tailored for websites and blogs. Both platforms allow you to display targeted ads to your audience and earn money based on clicks, impressions, or other engagement metrics.

However, getting approved for AdMob or AdSense is not always straightforward. Google has strict policies and guidelines to ensure the quality of its advertising network, and many applicants face rejection due to common mistakes or oversights. In this article, we’ll explore everything you need to know about getting approved for AdMob and AdSense, including tips, strategies, and best practices to increase your chances of success.


Understanding AdMob and AdSense Approval Requirements

Before diving into the application process, it’s essential to understand the core requirements for both AdMob and AdSense. While the platforms serve different purposes (mobile apps vs. websites), their approval criteria share many similarities.

1. High-Quality Content

  • AdMob: Your app must provide value to users, be free of spammy or low-quality content, and comply with Google’s content policies. Apps with excessive ads, misleading functionality, or copied content are likely to be rejected.
  • AdSense: Your website or blog must have original, high-quality content that adheres to Google’s Webmaster Guidelines. Thin content, duplicate articles, or pages with little to no value will result in disapproval.

2. Compliance with Google’s Policies

Both AdMob and AdSense require strict adherence to Google’s policies, including:

  • Prohibited Content: Avoid content related to adult material, violence, hate speech, illegal activities, or copyrighted material.
  • User Experience: Ensure your app or website provides a positive user experience. This includes fast loading times, easy navigation, and no intrusive pop-ups or redirects.
  • Ad Placement: Follow Google’s ad placement policies. For example, don’t place ads too close to buttons or in a way that may confuse users.

3. Traffic and Engagement

  • AdMob: While there’s no strict traffic requirement, having an active user base and consistent engagement can improve your chances of approval.
  • AdSense: Google typically looks for websites with a decent amount of organic traffic and user engagement. New websites with little to no traffic may face rejection.

4. Technical Requirements

  • AdMob: Your app must be fully functional, free of bugs, and available on the Google Play Store or Apple App Store.
  • AdSense: Your website must have a professional design, be mobile-friendly, and use HTTPS for secure browsing.

Step-by-Step Guide to Applying for AdMob and AdSense

Now that you understand the requirements, let’s walk through the application process for both platforms.

Applying for AdMob

  1. Create a Google AdMob Account:
  • Visit the AdMob website and sign in with your Google account.
  • Click on “Start Now” and follow the prompts to set up your account.
  1. Add Your App:
  • Link your app to your AdMob account. If your app is already published on the Google Play Store or Apple App Store, you can search for it by name. If not, you’ll need to provide details about your app.
  1. Set Up Ad Units:
  • Create ad units for your app. AdMob offers various ad formats, including banner ads, interstitial ads, and rewarded ads. Choose the formats that best suit your app’s design and user experience.
  1. Integrate the AdMob SDK:
  • Download the AdMob SDK and integrate it into your app’s code. This step requires technical knowledge, so you may need to hire a developer if you’re not familiar with coding.
  1. Submit for Approval:
  • Once your app is live and the ad units are integrated, submit your app for review. Google will evaluate your app based on its content, functionality, and compliance with policies.

Applying for AdSense

  1. Create a Google AdSense Account:
  • Visit the AdSense website and sign in with your Google account.
  • Click on “Start Now” and fill out the application form with your website details.
  1. Verify Your Website:
  • Add the AdSense code to your website to verify ownership. This step ensures that you have control over the site you’re applying with.
  1. Submit for Approval:
  • Once your website is verified, submit your application. Google will review your site for compliance with its policies and content quality.

Common Reasons for Rejection and How to Avoid Them

Many applicants face rejection when applying for AdMob or AdSense. Here are some common reasons for disapproval and how to address them:

1. Low-Quality or Thin Content

  • Solution: Focus on creating original, high-quality content that provides value to your audience. Avoid copying content from other sources or publishing articles with little substance.

2. Non-Compliance with Policies

  • Solution: Familiarize yourself with Google’s policies and ensure your app or website adheres to them. Remove any prohibited content or features that may violate the guidelines.

3. Poor User Experience

  • Solution: Optimize your app or website for a seamless user experience. This includes improving loading times, ensuring mobile responsiveness, and avoiding intrusive ads.

4. Insufficient Traffic

  • Solution: If your website is new, focus on building traffic before applying for AdSense. Use SEO strategies, social media marketing, and other tactics to attract visitors.

5. Technical Issues

  • Solution: Test your app or website for bugs and errors before submitting your application. Ensure that all links work, the design is professional, and the site is secure (HTTPS).

Tips to Increase Your Chances of Approval

Here are some additional tips to improve your chances of getting approved for AdMob and AdSense:

1. Build a Strong Online Presence

  • For AdSense, having a well-established website with a history of quality content can work in your favor. Similarly, for AdMob, an app with positive reviews and a loyal user base is more likely to be approved.

2. Focus on Niche Content

  • Websites and apps that cater to a specific niche often perform better in terms of ad revenue and approval chances. Niche content tends to attract a more targeted audience, which is appealing to advertisers.

3. Use Professional Design

  • A clean, professional design reflects positively on your app or website. Avoid cluttered layouts, excessive ads, or outdated designs.

4. Monitor Your Analytics

  • Use tools like Google Analytics to track your traffic and user behavior. This data can help you identify areas for improvement and demonstrate your site’s performance during the application process.

5. Be Patient

  • The approval process can take time, especially for new apps or websites. Don’t get discouraged if you face rejection—use the feedback to make improvements and reapply.

What to Do After Approval

Once you’re approved for AdMob or AdSense, the work doesn’t stop there. Here are some steps to maximize your earnings and maintain compliance:

1. Optimize Ad Placement

  • Experiment with different ad formats and placements to find what works best for your audience. Avoid placing too many ads, as this can negatively impact user experience.

2. Monitor Performance

  • Use the AdMob or AdSense dashboard to track your ad performance. Analyze metrics like click-through rate (CTR), earnings per mille (EPM), and user engagement to identify trends and opportunities.

3. Stay Updated on Policies

  • Google frequently updates its policies, so it’s essential to stay informed. Regularly review the AdMob and AdSense policy pages to ensure ongoing compliance.

4. Diversify Your Revenue Streams

  • While AdMob and AdSense are excellent monetization tools, consider exploring other revenue streams, such as affiliate marketing, sponsored content, or selling digital products.

Conclusion

Getting approved for AdMob and AdSense requires careful planning, attention to detail, and a commitment to quality. By understanding the approval requirements, avoiding common pitfalls, and following best practices, you can increase your chances of success and start monetizing your app or website effectively.

Remember, the key to long-term success with AdMob and AdSense lies in providing value to your audience, maintaining compliance with Google’s policies, and continuously optimizing your content and ad strategy. With persistence and dedication, you can unlock the full potential of these powerful monetization platforms.

Make Your Own RDP Server in Microsoft Azure for Free || free rdp 

Creating your own RDP (Remote Desktop Protocol) server in Microsoft Azure for free is possible using Azure’s free tier offerings. While Azure typically requires a credit card for sign-up, you can use the free credits provided in the free tier to set up a virtual machine (VM) and configure RDP access. Below is a step-by-step guide to help you create your own free RDP server in Azure.


Step 1: Sign Up for Microsoft Azure Free Account

  1. Go to the Microsoft Azure Free Account page.
  2. Click on Start free.
  3. Sign up using your Microsoft account (or create one if you don’t have one).
  4. Provide the required details, including a phone number and credit card for identity verification.
  • Note: Azure requires a credit card to prevent abuse, but you won’t be charged if you stay within the free tier limits.
  1. Once signed up, you’ll receive $200 in free credits for 30 days and access to free services for 12 months.

Step 2: Create a Virtual Machine (VM)

  1. Log in to the Azure Portal.
  2. In the search bar, type Virtual Machines and select it.
  3. Click on Create and choose Azure virtual machine.

Configure the VM:

  • Subscription: Ensure you’re using the free trial subscription.
  • Resource Group: Create a new resource group or use an existing one.
  • Virtual Machine Name: Choose a name for your VM.
  • Region: Select a region close to you (some regions may not be available for free tier).
  • Image: Choose a free-tier eligible OS, such as Windows 10 Pro or Ubuntu Server.
  • Size: Select a free-tier eligible VM size, such as B1s (Burstable).
  • Note: The B1s VM is included in the free tier and provides 1 vCPU and 1 GB RAM.
  • Username and Password: Set up an admin username and password for the VM.
  • Public Inbound Ports: Allow RDP (3389) for Windows or SSH (22) for Linux.
  1. Click Review + Create, then Create to deploy the VM.

Step 3: Configure Network Security Group (NSG)

By default, Azure blocks inbound RDP traffic for security reasons. You’ll need to allow RDP traffic manually.

  1. Go to the VM you just created in the Azure portal.
  2. Under Settings, click on Networking.
  3. Click on Add inbound port rule.
  • Source: Any
  • Source port ranges: *
  • Destination: Any
  • Destination port ranges: 3389 (for Windows) or 22 (for Linux)
  • Protocol: TCP
  • Action: Allow
  • Priority: 100
  1. Save the rule.

Step 4: Connect to Your RDP Server

  1. Go to the VM in the Azure portal.
  2. Click on Connect and select RDP (for Windows) or SSH (for Linux).
  3. Download the RDP file (for Windows) or copy the SSH command (for Linux).
  4. Open the RDP file and enter the username and password you set up earlier.
  5. Click Connect, and you’ll be logged into your Azure VM.

Step 5: Optimize for Free Tier Usage

To avoid exceeding the free tier limits and incurring charges, follow these tips:

  • Use B1s VM Size: The B1s VM is included in the free tier and provides 750 hours of usage per month.
  • Stop/Deallocate the VM When Not in Use: Stop the VM from the Azure portal to avoid consuming free hours.
  • Monitor Usage: Regularly check your usage in the Azure portal to ensure you stay within the free tier limits.
  • Delete Unused Resources: Remove any resources you no longer need to avoid unnecessary charges.

Free Tier Limits to Keep in Mind

  • 750 Hours of B1s VM Usage: You can run a B1s VM for free for up to 750 hours per month.
  • 15 GB of Bandwidth: Free tier includes 15 GB of outbound data transfer per month.
  • 5 GB of Storage: Free tier includes 5 GB of standard storage.

Alternative: Use Azure for Students (No Credit Card Required)

If you’re a student, you can sign up for Azure for Students, which provides $100 in Azure credits and free services for 12 months without requiring a credit card.

Steps:

  1. Visit the Azure for Students page.
  2. Sign up using a valid school email address.
  3. Verify your student status.
  4. Follow the same steps above to create a VM and set up RDP.

Conclusion

By following this guide, you can create your own free RDP server in Microsoft Azure using the free tier. While Azure requires a credit card for sign-up, you won’t be charged if you stay within the free tier limits. Be sure to monitor your usage and optimize your resources to avoid unexpected charges.

If you’re unable to use Azure, consider exploring free alternatives like Google Cloud Platform, Oracle Cloud, or setting up a local VM using tools like VirtualBox. Always prioritize security and compliance when using cloud services.

azure rdp without credit card

Obtaining an Azure RDP (Remote Desktop Protocol) without a credit card is challenging because Microsoft Azure typically requires a payment method for identity verification and to prevent abuse of its free services. However, there are a few legitimate ways to access Azure RDP without providing credit card details. Below, I’ll outline some strategies and alternatives to help you achieve this.


1. Azure for Students (No Credit Card Required)

Microsoft offers a special program called Azure for Students, which provides $100 in Azure credits and free access to popular services for 12 months. Importantly, this program does not require a credit card for registration.

Steps to Use Azure for Students:

  1. Visit the Azure for Students page.
  2. Sign up using a valid school email address (e.g., ending in .edu).
  3. Verify your student status through Microsoft’s verification process.
  4. Once approved, you’ll gain access to $100 in Azure credits and free services.
  5. Create a virtual machine (VM) and configure RDP to connect remotely.

Note: This offer is only available to students aged 18 and older. If you don’t have a school email, you may not be eligible.


2. Use Azure Free Credits from Promotions

Microsoft occasionally runs promotions that provide free Azure credits without requiring a credit card. These promotions are often targeted at specific regions, user groups, or events.

How to Find Promotions:

  1. Follow Microsoft’s official social media channels, newsletters, and blogs.
  2. Participate in Microsoft-sponsored events, hackathons, or developer programs.
  3. Check websites like Reddit, GitHub, or tech forums for ongoing promotions.

3. Use Azure DevTest Labs

Azure DevTest Labs is a service designed for developers and testers to create VMs and other resources at a lower cost. Some organizations, educational institutions, or community programs provide access to DevTest Labs without requiring a credit card.

Steps to Access DevTest Labs:

  1. Check if your school, employer, or a community program offers access to Azure DevTest Labs.
  2. Request access and follow the instructions provided by the organization.
  3. Once granted access, create a VM and set up RDP.

4. Use Free Cloud Alternatives

If you’re unable to access Azure RDP without a credit card, consider using free alternatives that offer similar functionality. Some of these platforms may not require a payment method for their free tiers.

Free Cloud Platforms:

  • Google Cloud Platform (GCP): Offers a free tier with $300 in credits for 90 days (credit card required, but no charges if you stay within limits).
  • Oracle Cloud: Provides a free tier with no credit card required for certain services.
  • Amazon Web Services (AWS): Offers a free tier for 12 months (credit card required).
  • Heroku: Provides a free tier for hosting applications.

5. Use Local Virtual Machines

If your goal is to practice or experiment with RDP, you can set up a local virtual machine (VM) on your computer using free tools like VirtualBox or VMware Player. This approach doesn’t require any cloud services or payment methods.

Steps to Set Up a Local VM:

  1. Download and install VirtualBox (free and open-source).
  2. Download a free operating system image (e.g., Windows 10 Evaluation or Linux).
  3. Create a VM in VirtualBox and install the OS.
  4. Enable Remote Desktop (for Windows) or use SSH (for Linux) to connect to the VM.

6. Use Community or Educational Programs

Some community programs, non-profits, or educational initiatives provide free access to cloud resources, including Azure. Examples include:

  • Microsoft Imagine Cup: A global competition that often provides free Azure credits to participants.
  • GitHub Student Developer Pack: Includes free Azure credits for students.
  • Non-profit Programs: Microsoft offers discounted or free Azure credits for eligible non-profits.

How to Set Up RDP on Azure

If you gain access to Azure through one of the methods above, follow these steps to set up RDP:

  1. Create a Virtual Machine:
  • Log in to the Azure portal.
  • Navigate to “Virtual Machines” and click “Create.”
  • Choose a free-tier eligible VM (e.g., B1s Burstable VM).
  • Configure the VM settings (region, size, OS, etc.).
  1. Configure Network Settings:
  • Allow inbound RDP traffic (port 3389) in the network security group (NSG).
  1. Connect via RDP:
  • Download the RDP file from the Azure portal.
  • Open the RDP file and enter your VM’s credentials.
  • You’re now connected to your Azure VM!

Tips for Using Azure Responsibly

  • Monitor Usage: Keep track of your resource usage to avoid exceeding free tier limits.
  • Shut Down VMs When Not in Use: Stop or deallocate VMs to prevent unnecessary charges.
  • Use Automation: Use scripts to automate VM startup and shutdown.
  • Explore Free Services: Take advantage of Azure’s free services like App Service, Functions, and Cosmos DB.

Conclusion

While obtaining a free Azure RDP without a credit card is not straightforward, options like the Azure for Students program, promotions, and community programs can help you access Azure resources. If these methods don’t work for you, consider using free alternatives or setting up local virtual machines for RDP practice.

Always ensure you comply with the terms of service of any platform you use, and monitor your usage to avoid unexpected charges. With the right approach, you can leverage cloud resources for your projects without needing a credit card.

azure free rdp without credit debit card unlimited

Obtaining a free Azure RDP (Remote Desktop Protocol) without a credit or debit card and with unlimited access is not feasible through legitimate means. Microsoft Azure, like most cloud service providers, requires a payment method for identity verification and to prevent abuse of its free services. Additionally, Azure’s free tier has strict limits on usage, and unlimited access is not part of any free offering.

However, if you’re looking for long-term free access to Azure RDP or similar services without a credit or debit card, there are some workarounds and alternative approaches you can explore. Below, I’ll outline strategies to maximize free access and alternatives that might meet your needs.


1. Azure for Students (No Credit Card Required)

Microsoft’s Azure for Students program offers $100 in Azure credits and access to free services for 12 months without requiring a credit or debit card. While this is not unlimited, it provides a substantial amount of resources for free.

Steps to Use Azure for Students:

  1. Visit the Azure for Students page.
  2. Sign up using a valid school email address (e.g., ending in .edu).
  3. Verify your student status through Microsoft’s verification process.
  4. Once approved, you’ll gain access to $100 in Azure credits and free services.
  5. Create a virtual machine (VM) and configure RDP to connect remotely.

Note: This offer is only available to students aged 18 and older. If you don’t have a school email, you may not be eligible.


2. Use Azure Free Tier with Minimal Usage

Azure’s free tier includes 750 hours of B1S Burstable VM usage per month for the first 12 months. While this is not unlimited, you can maximize your usage by:

  • Stopping or deallocating VMs when not in use to avoid unnecessary consumption of free hours.
  • Using automation scripts to start and stop VMs as needed.

Steps to Set Up RDP on Azure Free Tier:

  1. Sign up for Azure’s free tier (credit/debit card required for verification).
  2. Create a B1S Burstable VM.
  3. Configure the VM to allow RDP traffic (port 3389).
  4. Connect to the VM using the RDP file provided in the Azure portal.

3. Use Azure DevTest Labs

Azure DevTest Labs is a service designed for developers and testers to create VMs and other resources at a lower cost. Some organizations, educational institutions, or community programs provide access to DevTest Labs without requiring a credit or debit card.

Steps to Access DevTest Labs:

  1. Check if your school, employer, or a community program offers access to Azure DevTest Labs.
  2. Request access and follow the instructions provided by the organization.
  3. Once granted access, create a VM and set up RDP.

4. Use Free Cloud Alternatives

If you’re unable to access Azure RDP without a credit or debit card, consider using free alternatives that offer similar functionality. Some of these platforms may not require a payment method for their free tiers.

Free Cloud Platforms:

  • Google Cloud Platform (GCP): Offers a free tier with $300 in credits for 90 days (credit card required, but no charges if you stay within limits).
  • Oracle Cloud: Provides a free tier with no credit card required for certain services.
  • Amazon Web Services (AWS): Offers a free tier for 12 months (credit card required).
  • Heroku: Provides a free tier for hosting applications.

5. Use Local Virtual Machines

If your goal is to practice or experiment with RDP, you can set up a local virtual machine (VM) on your computer using free tools like VirtualBox or VMware Player. This approach doesn’t require any cloud services or payment methods.

Steps to Set Up a Local VM:

  1. Download and install VirtualBox (free and open-source).
  2. Download a free operating system image (e.g., Windows 10 Evaluation or Linux).
  3. Create a VM in VirtualBox and install the OS.
  4. Enable Remote Desktop (for Windows) or use SSH (for Linux) to connect to the VM.

6. Use Community or Educational Programs

Some community programs, non-profits, or educational initiatives provide free access to cloud resources, including Azure. Examples include:

  • Microsoft Imagine Cup: A global competition that often provides free Azure credits to participants.
  • GitHub Student Developer Pack: Includes free Azure credits for students.
  • Non-profit Programs: Microsoft offers discounted or free Azure credits for eligible non-profits.

7. Use Free RDP Hosting Services

There are some free RDP hosting services available online, but these are often unreliable, insecure, or come with significant limitations. Be cautious when using such services, as they may compromise your privacy or security.

Examples of Free RDP Hosting Services:

  • EagleRDP: Offers free RDP hosting with limited resources.
  • GoormIDE: Provides cloud-based development environments with free tiers.
  • CloudSigma: Offers a free tier with limited resources.

8. Use Free Trials from Other Cloud Providers

If Azure is not an option, you can explore free trials from other cloud providers that offer RDP-like functionality. Some providers may not require a credit or debit card for their free trials.

Examples:

  • Google Cloud Platform (GCP): $300 in free credits for 90 days.
  • Oracle Cloud: Free tier with no credit card required for certain services.
  • AWS Free Tier: 12 months of free access to select services.

Important Considerations

  • No Truly Unlimited Free RDP: There is no legitimate way to get unlimited free RDP without some form of verification or payment method.
  • Security Risks: Be cautious when using free RDP services, as they may expose you to security vulnerabilities or data breaches.
  • Compliance: Always comply with the terms of service of any platform you use.

Conclusion

While obtaining a free Azure RDP without a credit or debit card and with unlimited access is not possible, you can maximize free resources through programs like Azure for Students, free tiers, and community programs. If these options don’t meet your needs, consider using free alternatives or setting up local virtual machines for RDP practice.

Always prioritize security and compliance when using cloud services, and monitor your usage to avoid unexpected charges. With the right approach, you can leverage free resources effectively for your projects.

azure free rdp without credit debit card

Getting a free Azure RDP (Remote Desktop Protocol) without using a credit or debit card can be challenging, as Microsoft Azure typically requires a payment method for identity verification and to prevent abuse of its free services. However, there are a few legitimate methods you can explore to access Azure RDP without providing credit or debit card details. Below, I’ll outline some strategies and alternatives.


1. Azure for Students Offer

Microsoft offers a special program called Azure for Students, which provides $100 in Azure credits and free access to popular services for 12 months. Importantly, this program does not require a credit or debit card for registration.

Steps to Use Azure for Students:

  1. Go to the Azure for Students page.
  2. Sign up using a valid school email address (e.g., ending in .edu).
  3. Verify your student status through Microsoft’s verification process.
  4. Once approved, you’ll gain access to $100 in Azure credits and free services.
  5. Create a virtual machine (VM) and configure RDP to connect remotely.

Note: This offer is only available to students aged 18 and older. If you don’t have a school email, you may not be eligible.


2. Use Azure Free Credits from Promotions

Microsoft occasionally runs promotions that provide free Azure credits without requiring a credit or debit card. These promotions are often targeted at specific regions, user groups, or events.

How to Find Promotions:

  1. Follow Microsoft’s official social media channels, newsletters, and blogs.
  2. Participate in Microsoft-sponsored events, hackathons, or developer programs.
  3. Check websites like Reddit, GitHub, or tech forums for ongoing promotions.

3. Use Azure DevTest Labs

Azure DevTest Labs is a service designed for developers and testers to create VMs and other resources at a lower cost. Some organizations, educational institutions, or community programs provide access to DevTest Labs without requiring a credit or debit card.

Steps to Access DevTest Labs:

  1. Check if your school, employer, or a community program offers access to Azure DevTest Labs.
  2. Request access and follow the instructions provided by the organization.
  3. Once granted access, create a VM and set up RDP.

4. Use Free Cloud Alternatives

If you’re unable to access Azure RDP without a credit or debit card, consider using free alternatives that offer similar functionality. Some of these platforms may not require a payment method for their free tiers.

Free Cloud Platforms:

  • Google Cloud Platform (GCP): Offers a free tier with $300 in credits for 90 days (credit card required, but no charges if you stay within limits).
  • Oracle Cloud: Provides a free tier with no credit card required for certain services.
  • Amazon Web Services (AWS): Offers a free tier for 12 months (credit card required).
  • Heroku: Provides a free tier for hosting applications.

5. Use Local Virtual Machines

If your goal is to practice or experiment with RDP, you can set up a local virtual machine (VM) on your computer using free tools like VirtualBox or VMware Player. This approach doesn’t require any cloud services or payment methods.

Steps to Set Up a Local VM:

  1. Download and install VirtualBox (free and open-source).
  2. Download a free operating system image (e.g., Windows 10 Evaluation or Linux).
  3. Create a VM in VirtualBox and install the OS.
  4. Enable Remote Desktop (for Windows) or use SSH (for Linux) to connect to the VM.

6. Use Community or Educational Programs

Some community programs, non-profits, or educational initiatives provide free access to cloud resources, including Azure. Examples include:

  • Microsoft Imagine Cup: A global competition that often provides free Azure credits to participants.
  • GitHub Student Developer Pack: Includes free Azure credits for students.
  • Non-profit Programs: Microsoft offers discounted or free Azure credits for eligible non-profits.

How to Set Up RDP on Azure

If you gain access to Azure through one of the methods above, follow these steps to set up RDP:

  1. Create a Virtual Machine:
  • Log in to the Azure portal.
  • Navigate to “Virtual Machines” and click “Create.”
  • Choose a free-tier eligible VM (e.g., B1s Burstable VM).
  • Configure the VM settings (region, size, OS, etc.).
  1. Configure Network Settings:
  • Allow inbound RDP traffic (port 3389) in the network security group (NSG).
  1. Connect via RDP:
  • Download the RDP file from the Azure portal.
  • Open the RDP file and enter your VM’s credentials.
  • You’re now connected to your Azure VM!

Tips for Using Azure Responsibly

  • Monitor Usage: Keep track of your resource usage to avoid exceeding free tier limits.
  • Shut Down VMs When Not in Use: Stop or deallocate VMs to prevent unnecessary charges.
  • Use Automation: Use scripts to automate VM startup and shutdown.
  • Explore Free Services: Take advantage of Azure’s free services like App Service, Functions, and Cosmos DB.

Conclusion

While obtaining a free Azure RDP without a credit or debit card is not straightforward, options like the Azure for Students program, promotions, and community programs can help you access Azure resources. If these methods don’t work for you, consider using free alternatives or setting up local virtual machines for RDP practice.

Always ensure you comply with the terms of service of any platform you use, and monitor your usage to avoid unexpected charges. With the right approach, you can leverage cloud resources for your projects without needing a credit or debit card.

free azure rdp without credit card

How to Get Free Azure RDP Without Credit Card: A Comprehensive Guide

Azure Remote Desktop Protocol (RDP) is a powerful tool that allows users to connect to virtual machines (VMs) hosted on Microsoft Azure. It’s widely used for development, testing, and remote work. However, many users are hesitant to sign up for Azure services because they require a credit card for registration, even for free trials. This guide will walk you through the process of obtaining a free Azure RDP without needing a credit card.


What is Azure RDP?

Azure RDP is a feature of Microsoft Azure that enables users to remotely access and control virtual machines hosted on Azure’s cloud platform. It’s commonly used for:

  • Software development and testing
  • Running resource-intensive applications
  • Remote work and collaboration
  • Learning and experimenting with cloud technologies

While Azure offers a free tier with limited resources, the requirement of a credit card for registration can be a barrier for some users. Below, we’ll explore legitimate ways to access Azure RDP without providing credit card details.


Why Does Azure Require a Credit Card?

Microsoft Azure requires a credit card for identity verification and to prevent abuse of its free services. Even though the free tier includes $200 in credits for 30 days and access to certain services for 12 months, the credit card is used to ensure that users are legitimate and to charge for any usage beyond the free limits.

However, there are ways to access Azure RDP without a credit card, as outlined below.


Methods to Get Free Azure RDP Without Credit Card

1. Use Azure for Students

Microsoft offers a free Azure for Students program that provides $100 in Azure credits and access to popular services for 12 months. Importantly, this program does not require a credit card for registration.

Steps to Sign Up:

  1. Visit the Azure for Students page.
  2. Sign in with your valid school email address (e.g., ending in .edu).
  3. Verify your student status through Microsoft’s verification process.
  4. Once approved, you’ll receive $100 in Azure credits and access to free services.
  5. Create a virtual machine (VM) and set up RDP to connect remotely.

Note: This offer is only available to students aged 18 and older.


2. Use Azure Free Tier with Virtual Credit Cards

If you don’t have a credit card, you can use a virtual credit card (VCC) to sign up for Azure’s free tier. Some VCC providers offer temporary card numbers that can be used for verification purposes.

Steps to Use a VCC:

  1. Sign up for a virtual credit card service (e.g., Privacy.com, Revolut, or Payoneer).
  2. Generate a temporary card number with a low balance (e.g., $1).
  3. Use this card number to sign up for Azure’s free tier.
  4. Once registered, you can create a VM and set up RDP.

Caution: Ensure that the VCC provider allows transactions with Microsoft Azure.


3. Use Azure Free Credits from Promotions

Microsoft occasionally runs promotions that offer free Azure credits without requiring a credit card. These promotions are often targeted at specific regions or user groups.

How to Find Promotions:

  1. Follow Microsoft’s official social media channels and newsletters.
  2. Check websites like Reddit, GitHub, or tech forums for ongoing promotions.
  3. Participate in Microsoft-sponsored events, hackathons, or developer programs that offer free Azure credits.

4. Use Azure DevTest Labs

Azure DevTest Labs is a service designed for developers and testers to create VMs and other resources at a lower cost. Some organizations and educational institutions provide access to DevTest Labs without requiring a credit card.

Steps to Access DevTest Labs:

  1. Check if your school, employer, or a community program offers access to Azure DevTest Labs.
  2. Request access and follow the instructions provided by the organization.
  3. Once granted access, create a VM and set up RDP.

5. Use Free Alternatives to Azure RDP

If obtaining Azure RDP without a credit card proves challenging, consider using free alternatives that offer similar functionality:

  • Google Cloud Platform (GCP): Offers a free tier with $300 in credits for 90 days (credit card required, but no charges if you stay within limits).
  • Amazon Web Services (AWS): Provides a free tier for 12 months (credit card required).
  • Oracle Cloud: Offers a free tier with no credit card required for certain services.
  • Heroku: Provides a free tier for hosting applications.
  • Vagrant and VirtualBox: Use these tools to create local virtual machines for free.

How to Set Up RDP on Azure

Once you’ve gained access to Azure through one of the methods above, follow these steps to set up RDP:

  1. Create a Virtual Machine:
  • Log in to the Azure portal.
  • Navigate to “Virtual Machines” and click “Create.”
  • Choose a free-tier eligible VM (e.g., B1s Burstable VM).
  • Configure the VM settings (region, size, OS, etc.).
  1. Configure Network Settings:
  • Allow inbound RDP traffic (port 3389) in the network security group (NSG).
  1. Connect via RDP:
  • Download the RDP file from the Azure portal.
  • Open the RDP file and enter your VM’s credentials.
  • You’re now connected to your Azure VM!

Tips for Using Azure RDP Responsibly

  • Monitor Usage: Keep track of your resource usage to avoid exceeding free tier limits.
  • Shut Down VMs When Not in Use: Stop or deallocate VMs to prevent unnecessary charges.
  • Use Automation: Use scripts to automate VM startup and shutdown.
  • Explore Free Services: Take advantage of Azure’s free services like App Service, Functions, and Cosmos DB.

Conclusion

While Microsoft Azure typically requires a credit card for registration, there are legitimate ways to access Azure RDP without one. By leveraging programs like Azure for Students, virtual credit cards, or free promotions, you can enjoy the benefits of Azure’s cloud services. If these options don’t work for you, consider exploring free alternatives to Azure RDP.

Remember to use Azure resources responsibly and monitor your usage to avoid unexpected charges. With the right approach, you can harness the power of Azure RDP for your projects without the need for a credit card.